Blood Sugar Friendly Gluten-Free Baguette Recipe: Crispy, Airy, High-Protein & High-Fiber

Note: Everyone’s glucose response is individual. This blood-sugar–friendly gluten-free baguette is designed to be more fiber- and protein-forward than many starch-heavy gluten-free breads, but it’s not medical advice. If you manage diabetes or prediabetes, use your meter/CGM and follow your clinician’s guidance.
Hello, fellow bread lovers. If you’ve ever searched for a gluten free baguette recipe that doesn’t bake up dense or gummy, you’re not alone.
I wanted a crispy gluten free baguette with an airy gluten free baguette crumb—without relying on a starch-heavy base.
Many online gluten-free baguettes can feel “rice-cake-like” or depend heavily on refined starches—something that may not match blood-sugar goals.
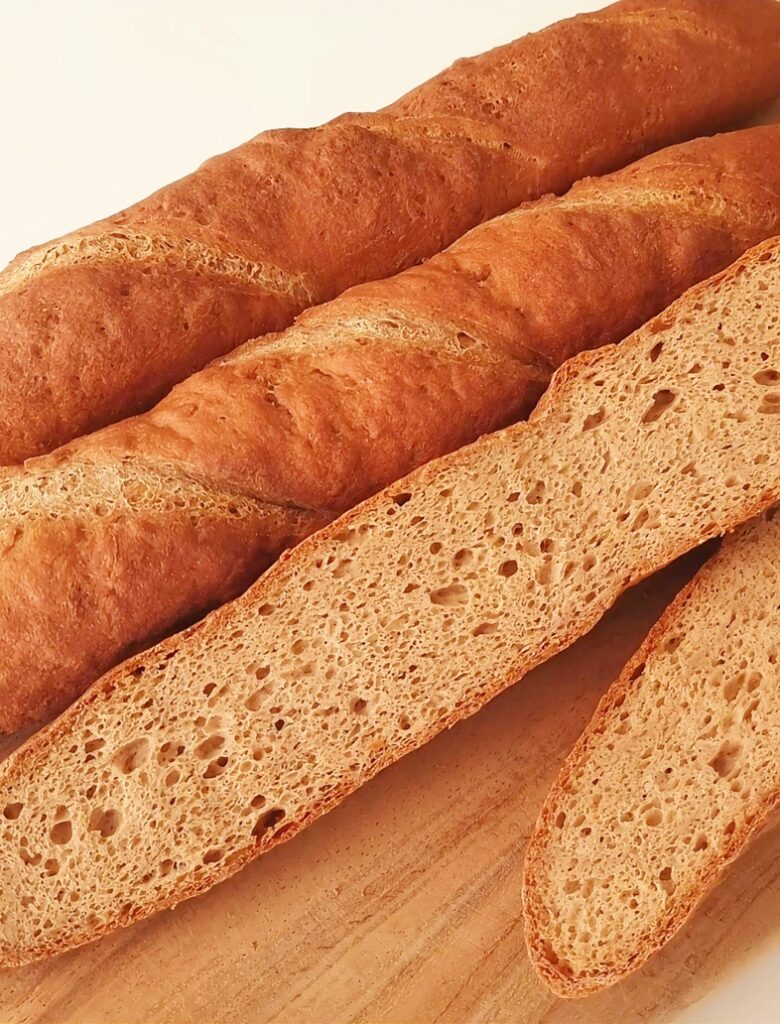
So I created this: a high protein high fiber gluten free baguette blueprint that aims to mimic the real baguette experience—crisp outside, airy inside.

Table of Contents
- Why I Created This Blood Sugar Friendly Gluten-Free Baguette
- The 3 Goals (Crispy + Airy + Repeatable)
- The Science: Psyllium Structure, Hydration, and Flavor
- Ingredients (420g Blend Base) + Roles
- Step-by-Step Instructions (GF Baguette Method)
- 3-Stage Baking Protocol (Oven Spring → Set → Dry)
- Troubleshooting (Dense, Gummy, or Collapsed?)
- Storage & Re-Crisping
1) Why I Created This Blood Sugar Friendly Gluten-Free Baguette
Store-bought mixes can be convenient, but for a blood sugar friendly gluten free baguette, they often miss the mark.
- Texture: Instead of a crisp baguette crust, many turn gummy or heavy.
- Nutrition direction: Many rely on refined starches, which may not align with steadier blood sugar goals. :contentReference[oaicite:2]{index=2}
- Adaptability: Without understanding the “why,” it’s hard to adjust a gluten-free baguette recipe for your oven or climate.
My goal was to create a high protein, high fiber gluten-free baguette with a more balanced “everyday bread” feel—so you can enjoy toast or sandwiches with more confidence.
2) The 3 Goals (Crispy Crust, Airy Crumb, More Fiber/Protein)
- Crispy gluten free baguette crust: crackly and dry—not rubbery.
- Airy gluten free baguette crumb: open-ish holes and a flexible bite.
- Repeatable method: proofing cues based on dough behavior, not just “wait X minutes.”
3) The Science Behind This High-Protein, High-Fiber Gluten-Free Baguette
A) Structure: Psyllium Husk + Xanthan Gum
A classic baguette relies on gluten. In a psyllium husk gluten free bread approach, psyllium creates an elastic gel network, while xanthan gum helps stabilize gas bubbles so the dough can rise and hold shape.
B) Hydration: Fiber + Protein Need Water
High-fiber and high-protein flours absorb a lot of water. This gluten-free baguette recipe uses higher hydration so the crumb stays moist, flexible, and less brick-like.
C) Flavor & Crumb: Apple Cider Vinegar (No-Sugar Strategy)
Because this recipe doesn’t rely on sugar, apple cider vinegar helps soften “beany” notes (common in legume-based blends) and supports a more open, airy crumb.
4) Ingredients for the Gluten-Free Baguette Recipe (420g Blend Base)
Liquids & Seasoning
| Ingredient | Amount | Role |
|---|---|---|
| Lukewarm water | 540g | Hydration |
| Extra virgin olive oil | 12g | Softens crumb |
| Apple cider vinegar | 10g | Flavor + supports airy crumb |
| Salt | 8g | Flavor balance (heart-minded version) |
| Dry yeast | 9g | Rise |
Flour Blend (Total: 420g)
| Ingredient | Amount | Role |
|---|---|---|
| Lupin flour | 84g | High-protein base (lupin flour bread recipe component) |
| Oat fiber | 84g | High fiber; helps a lower-starch approach |
| Tapioca starch | 105g | Elasticity + lighter texture |
| Brown rice flour | 33.6g | Flavor base |
| Millet flour | 42g | Softness |
| Sorghum flour | 25.2g | Body + structure |
| Buckwheat flour | 4.2g | Flavor depth |
| Psyllium husk powder | 37.8g | Main structure builder |
| Xanthan gum | 4.2g | Stabilizes air pockets |
5) Step-by-Step: Crispy & Airy Gluten-Free Baguette Method
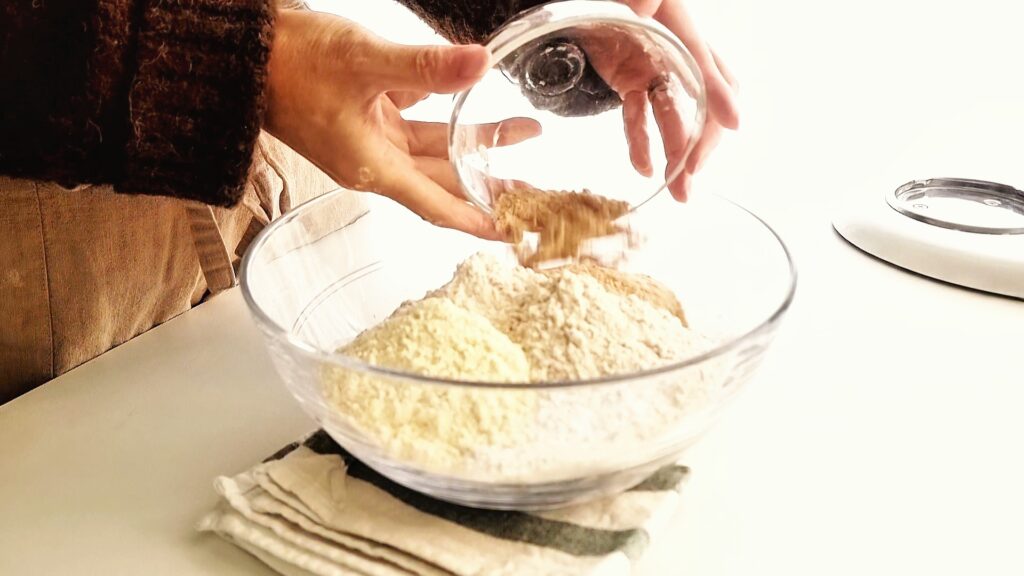
Step 1 — Mix the dry ingredients (crucial for psyllium + xanthan)
Whisk all dry ingredients until completely uniform. This matters most for psyllium husk powder and xanthan gum—even distribution prevents uneven gumminess and helps an airy gluten free baguette crumb.
Step 2 — Prepare the yeast (instant vs active dry)
- Instant dry yeast: Mix directly into the flour blend.
- Active dry yeast: Warm 50–100g of the recipe water to 40°C / 104°F, add yeast, wait 10 minutes until foamy, then add with the remaining liquids.
Step 3 — Mix + first rise
Combine liquids with the dry bowl and mix until fully hydrated (about 3 minutes in a stand mixer, or until smooth by hand). You’re not kneading for gluten—just building a well-hydrated dough for this gluten free baguette recipe.
First rise target: about 1.4–1.6× volume increase.
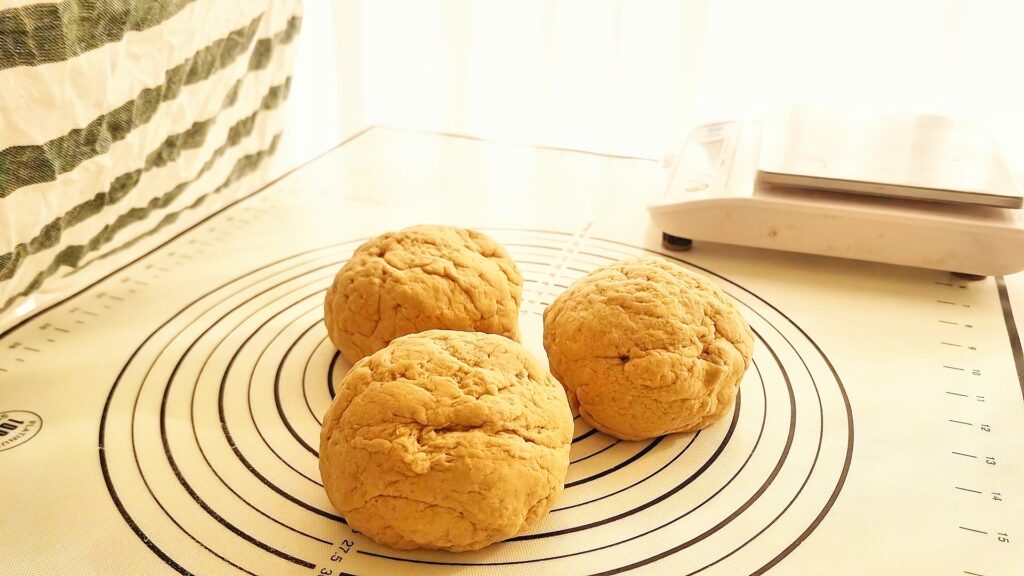
Step 4 — Bench rest
Divide into 3 pieces (about 330–335g each), cover, and rest for 10 minutes to relax the dough before shaping.
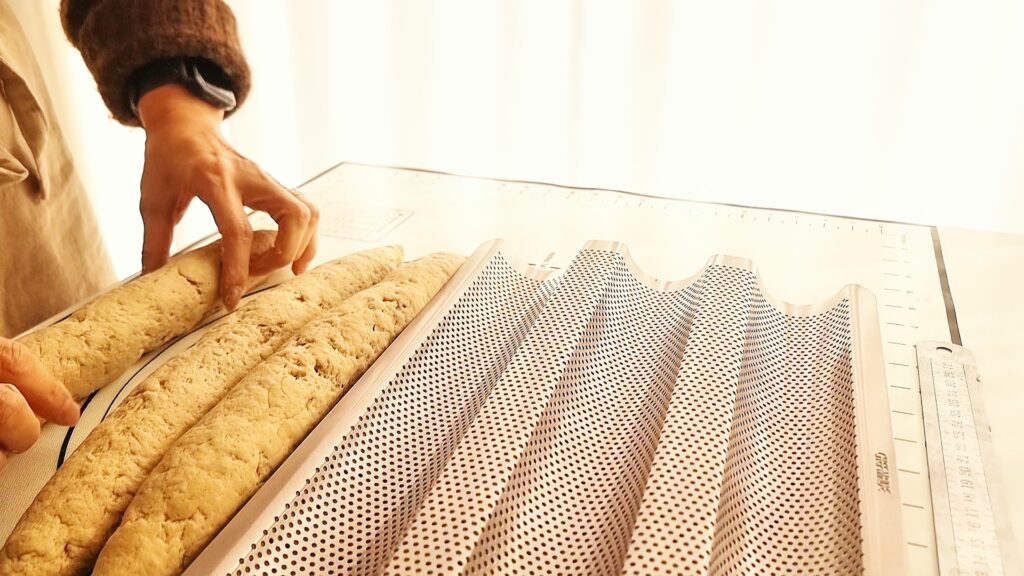
Step 5 — Shape + second proof
With lightly oiled or wet hands, shape into baguettes (about 32cm). Proof until ready.
- Volume: about 1.5×
- Surface: taut with tiny bubbles underneath
- Wobble test: a slight jelly-like jiggle (collapse = over-proofed)
Step 6 — Score the baguettes (right before baking)
Score each baguette immediately before it goes into the oven. Use a sharp lame/razor (or a very sharp knife) and make 3–4 diagonal slashes at a 30–45° angle, about 0.5–1 cm (¼–½ in) deep.
Goal: scoring controls where the loaf expands, improves oven spring, and creates a cleaner, more baguette-like crust.
Pro tips:
-
If the surface is sticky, lightly oil the blade or dip it in water between cuts.
-
Score with quick, confident strokes—hesitation can drag the dough.
-
If the loaf is over-proofed, score more gently and slightly shallower to avoid collapse.
6) The Three-Step Bake (Spring → Set → Dry)
Preheat (I usually start preheating the oven during the 10-minute bench rest.)
- 250°C / 482°F for 40 minutes
A blazing-hot oven is key for a crisp gluten-free baguette crust and strong oven spring—and a burst of steam at the start helps keep the surface flexible for better expansion.
No steam pan? Here are easy options:
-
Preheat a small metal tray: Place a small, empty metal tray (or loaf pan) on the lower rack during preheat. Right after you load the baguettes, carefully pour ½ cup / 120 ml of boiling water into the hot tray and close the door quickly.
-
Use a preheated cast-iron skillet (best steam): Preheat a cast-iron skillet on the bottom rack. Add boiling water immediately after loading the bread.
Important: Avoid spraying water directly onto the oven light/glass. Always use boiling water and work quickly to keep heat in.
Stage 1 — Oven Spring (rapid expansion)
- 230°C / 446°F for 9 minutes
- Goal: maximize rise and open air pockets before the crust sets
Stage 2 — Set the structure (lock the crumb)
- Open the oven and remove the steam pan.
-
- Goal: stabilize the crumb so the loaf doesn’t collapse or shrink as it cools
- Tip: cover loosely with foil if browning too fast
Stage 3 — Dry & finish (crunchy, not soggy)
- 180°C / 356°F for 12 minutes
- Goal: drive off excess moisture for a crisp crust and better keeping quality
Vital note: Cool at least 1 hour before slicing—cutting early can make the crumb feel gummy.
7) Troubleshooting Your High-Protein, High-Fiber Gluten-Free Baguette
- Collapsed loaf: over-proofed or under-baked → proof slightly less or extend Stage 2.
- Too dense: under-proofed or dough too stiff → check proof cues and hydration.
- Gummy inside: sliced too early or Stage 3 too short → keep Stage 3 and cool fully.
- Over-browning: foil during Stage 2 (and keep it through Stage 3 if needed).
8) Storage & Re-Crisping (Best Texture Tomorrow Too)
- Day 1: cool completely, store airtight.
- Day 2: re-crisp in toaster/oven for a crispier crust.
- Freeze: slice, freeze, reheat from frozen.
Gluten-free baking doesn’t have to mean giving up baguette joy. I hope this blood sugar friendly gluten free baguette brings real bread energy back to your kitchen.
If you bake it, leave a comment with your proofing notes and oven behavior—your data helps me refine this gluten free baguette recipe even further.
Happy baking,
HealBaker
Blood Sugar Friendly Gluten-Free Baguette Recipe: Crispy, Airy, High-Protein & High-Fiber
This gluten-free baguette is designed for a crisp crust and airy crumb—without relying on a starch-heavy base. Built with a high-protein, high-fiber blend (lupin + oat fiber) and structured with psyllium + xanthan, it follows a lower-carb approach for everyday balance. Finished with a 3-stage bake (spring → set → dry) for a crunchy, non-soggy crust.
Ingredients
Liquids & Seasoning
Flour Blend
Binders & Gums
Gluten-Free Baguette Instructions (Crispy & Airy, 3-Stage Bake
-
Mix the dry ingredients: In a large bowl, whisk all dry ingredients until completely uniform. Make sure psyllium husk powder and xanthan gum are evenly distributed (no clumps).
-
Prepare the yeast (choose your method): If using instant dry yeast, mix it directly into the dry blend. If using active dry yeast, bloom it: warm 50–100g of the recipe water to 40°C / 104°F, add yeast, and let stand 10 minutes until foamy.
-
Combine liquids: In a separate bowl, mix the remaining water with olive oil and apple cider vinegar.
-
Mix the dough: Pour liquids into the dry bowl and mix until fully hydrated and smooth (about 3 minutes in a stand mixer). You’re not kneading for gluten—just ensuring full hydration.
-
First rise (bulk fermentation): Cover and let rise in a warm spot until the dough increases to about 1.4–1.6× in volume. Use dough behavior, not the clock.
-
Divide & bench rest: Divide the dough into 3 equal pieces (about 330–335g each). Cover to prevent drying and rest for 10 minutes. I usually start preheating the oven during this bench rest.
-
Preheat + steam setup: Preheat the oven to 250°C / 482°F for 40 minutes. If using a steam pan, place it in the oven during preheat so it’s fully hot.
-
Shape: With lightly oiled or wet hands, shape each piece into a baguette (about 32 cm / 12.5 in). Place on a lined tray or baguette pan.
-
Second proof: Proof in a warm spot until about 1.5× in volume. Look for a taut surface with tiny bubbles underneath and a slight “jelly wobble” when you gently shake the tray.
-
Score each baguette immediately before it goes into the oven. Use a sharp lame/razor (or a very sharp knife) and make 3–4 diagonal slashes at a 30–45° angle, about 0.5–1 cm (¼–½ in) deep.
Goal: scoring controls where the loaf expands, improves oven spring, and creates a cleaner, more baguette-like crust. -
Stage 1 bake (oven spring): Bake at 230°C / 446°F for 9 minutes. Optional: use steam(boiling water) at the beginning to delay crust setting and encourage oven spring.
-
Remove steam pan: Carefully open the oven and remove the steam pan.
-
Stage 2 bake (set the structure): Reduce to 190°C / 374°F and bake for 18 minutes to set the crumb structure. If the crust browns too quickly, cover loosely with foil.
-
Stage 3 bake (dry & finish): Reduce to 180°C / 356°F and bake for 12 minutes to drive off excess moisture and finish a crisp crust.
-
Cool before slicing (important): Cool for at least 1 hour before slicing. Cutting early can make the crumb feel gummy.

Notes
Scale matters: For best results, use a kitchen scale (grams).
Proofing: Aim for dough cues (1.4–1.6× first rise, ~1.5× second proof), not exact minutes.
Foil: Use foil in Stage 2/3 if your oven browns aggressively.